
In this quick tutorial you'll learn how to draw a Redstart in 7 easy steps - great for kids and novice artists.
The images above represent how your finished drawing is going to look and the steps involved.
Below are the individual steps - you can click on each one for a High Resolution printable PDF version.
At the bottom you can read some interesting facts about the Redstart.
Make sure you also check out any of the hundreds of drawing tutorials grouped by category.
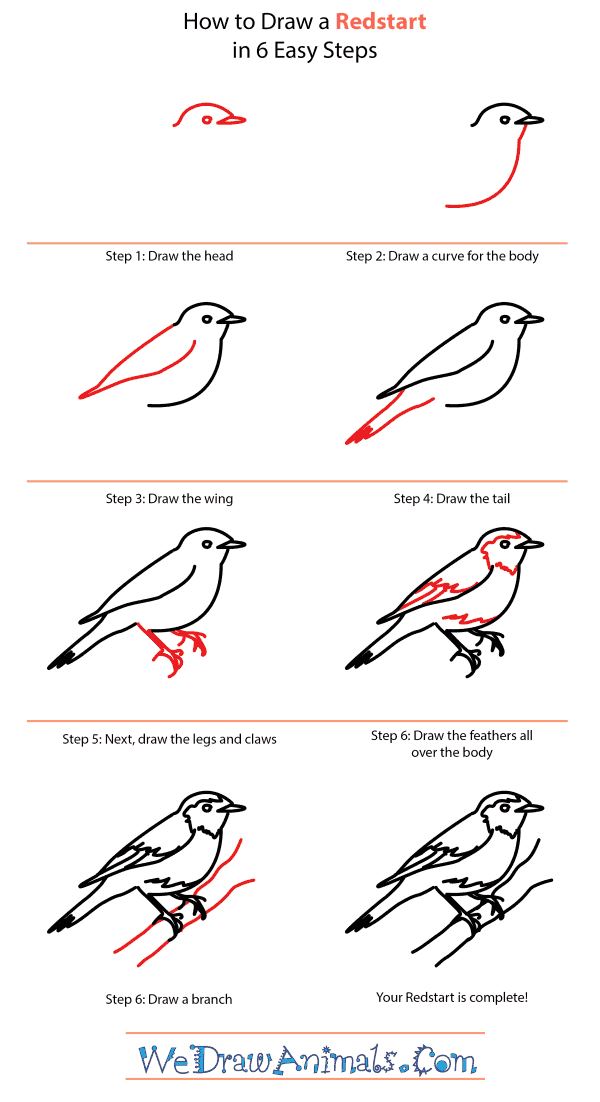
How to Draw a Redstart - Step-by-Step Tutorial

Step 1: Draw a small, rounded head complete with a short beak and eye.

Step 2: Draw a curve extending from the bottom of the beak to create the chest.

Step 3: Draw the wing, coming out from the back of the head.

Step 4: Add a thin, feathery tail to the bottom of the body.

Step 5: At the bottom of the body, draw two thin, short legs that end with claws.

Step 6: Add feathery detailing all over the body.

Step 7: Draw a branch for the bird to be perched upon, and your drawing is finished!
Interesting Facts about the Redstart
The Common Redstart has bright orange tail feathers that are partially hidden in flight and during their dancing displays. It was formerly thought to be of the “thrush” family but that has since been disproven. They are actually members of the “Old World Fly Catchers”. During breeding season, a female can lay up to seven eggs which only take fourteen days to hatch. Then chicks will leave the net after fifteen days.
Did you know?
- There are two subspecies of the Redstart
- Breeding occurs April through July
- Can be found mainly in Europe but have been spotted in China and Asia
- Diet includes worms, berries, fruits, and seeds
- They prefer to inhabit old oak woodland areas
Lesson Plan Idea – Research the two subspecies of Redstart. Have the class divide up into groups and write a report on their given Redstart species. Discuss as a class what makes them all different from one another.
How to Draw a Redstart – Step-by-Step Tutorial