
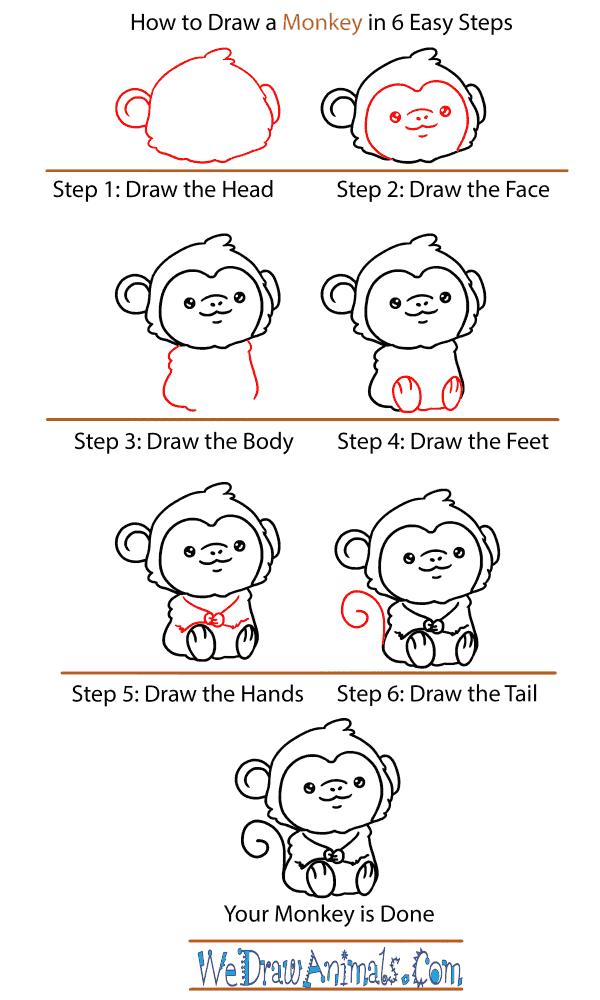
In this quick tutorial you'll learn how to draw a Baby Monkey in 7 easy steps - great for kids and novice artists.
The images above represent how your finished drawing is going to look and the steps involved.
Below are the individual steps - you can click on each one for a High Resolution printable PDF version.
At the bottom you can read some interesting facts about the Baby Monkey.
Make sure you also check out any of the hundreds of drawing tutorials grouped by category.
How to Draw a Baby Monkey - Step-by-Step Tutorial

Step 1: The baby monkey's head is mostly round--just curve out the chin a little and leave a space open for the neck.

Step 2: Draw two circles for the eye and a curved line for the nose. Don't forget to add a mouth!

Step 3: Next, we outline the face with a line. Then we draw his ear by making a large C shape toward the back of the head, with another, smaller C inside it.

Step 4: From there, draw a downward curving line. This will be the back of our baby monkey. Add a small tail, and curve the line around to form the rump.

Step 5: The top half of the monkey's hind leg looks like a big number 2 that moves down into the foot. Then draw another line like an L. The foot should have toes that look a lot like your fingers!

Step 6: Now we draw the front leg. Draw a straight line down for one side, and the other side has a curve as it goes up toward our monkey's face. The foot looks the same as the previous one.

Step 7: Do the same for the other front leg. The other hind leg is just a small arc under the monkey's rump. That's it, you've drawn a baby monkey! These adorable animals can range in color from very dark brown to a light red. Their faces are a lighter color than their soft fuzzy fur.
How to Draw a Baby Monkey – Step-by-Step Tutorial