
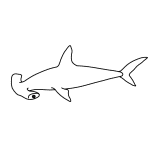
In this quick tutorial you'll learn how to draw a Baby Hammerhead Shark in 4 easy steps - great for kids and novice artists.
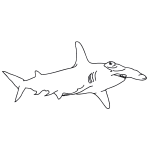
The images above represent how your finished drawing is going to look and the steps involved.
Below are the individual steps - you can click on each one for a High Resolution printable PDF version.
At the bottom you can read some interesting facts about the Baby Hammerhead Shark.
Make sure you also check out any of the hundreds of drawing tutorials grouped by category.
How to Draw a Baby Hammerhead Shark - Step-by-Step Tutorial
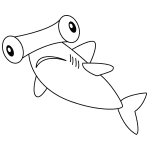
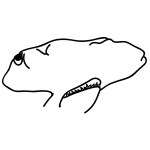

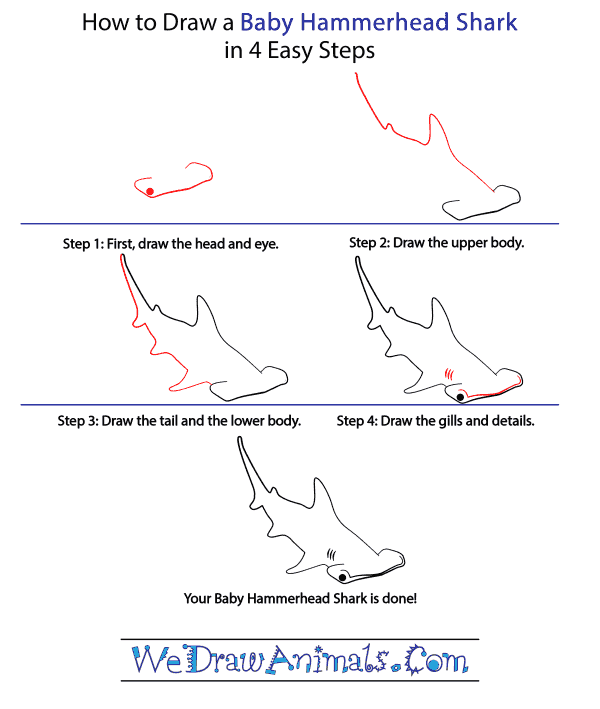
Step 1: To start our Hammerhead shark we'll draw the head and eye. Start with a rounded rectangle, leaving space on the rear side for the body later. Add a small shaded circle to the bottom left corner of the rectangle and that's that for this step.

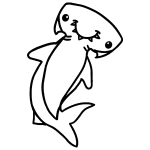
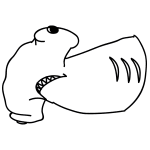
Step 2: Next we'll draw the upper body. Draw a curved line back and up from the spce we left in step 1. curve that line upward to form the shark's fin and bring the line straight down forming a point. Repeat this and make a smaller fin just behind what you've just drawn. last, draw a long line up and to the right from the second fin to form the top of your shark's tail.

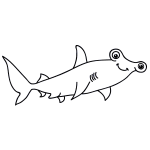
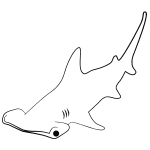
Step 3: Now we'll complete the tail and add the lower body of your shark. Draw a line down from the tip of the tail and curve it outward and then back again to make the bottom of the tail. Then draw a curved line down and to the left to follow the shark's body and add a small fin before continuing the line. now draw the final fin and bring it up to meet the sharks head. Now our basic outline is done and all we need is a little detail!

Step 4: last but not least, details! Add a curved line above your shark's eye and follow it across the front of the head. Draw three curved lines just behind the head for the gills and your Baby Hammerhead Shark is finally done!
How to Draw a Baby Hammerhead Shark – Step-by-Step Tutorial