
In this quick tutorial you'll learn how to draw a Bee Face in 8 easy steps - great for kids and novice artists.
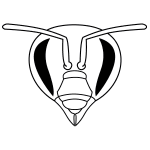
The images above represent how your finished drawing is going to look and the steps involved.
Below are the individual steps - you can click on each one for a High Resolution printable PDF version.
At the bottom you can read some interesting facts about the Bee Face.
Make sure you also check out any of the hundreds of drawing tutorials grouped by category.
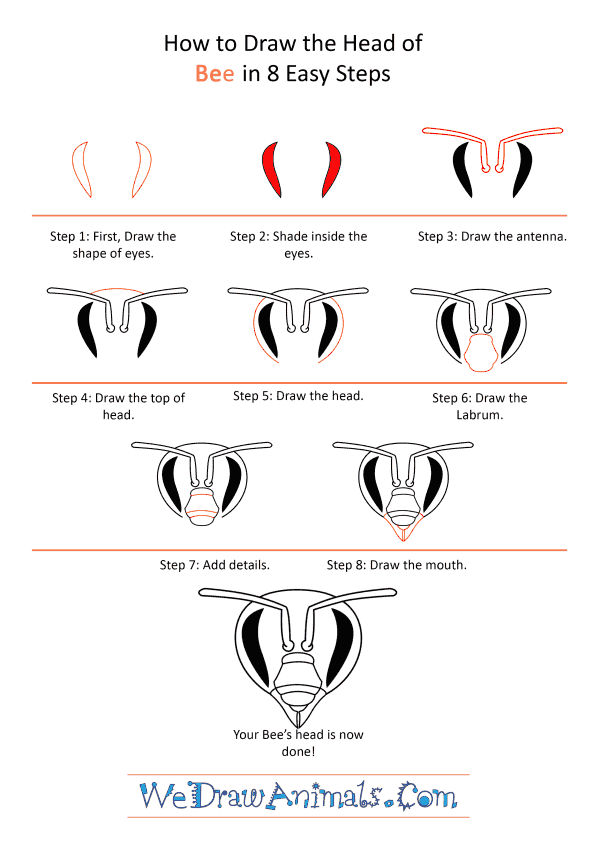
How to Draw a Bee Face - Step-by-Step Tutorial


Step 1: Start by drawing the shape of the eyes. Draw a curved line on the right and add another curved line on the inside joining it on the corners making both ends pointed. Draw the left eye the same way mirroring the right eye.

Step 2: Shade and color in the eyes.

Step 3: Let's draw the antenna. Start by drawing two thin tube-like appendages in the middle of the eyes. Curve them outward bending at right angles from above the eyes. Make the ends of the antennas round.

Step 4: Next we draw the top of the head by connecting the antennas in between by a curved line.

Step 5: Draw the rest of the head by drawing two curved lines outside of the eyes from the antenna to the bottom end of the eyes below.

Step 6: Now we draw the Labrum which is the bee's lips and is use dto suck the nectar. For drawing that, we draw an oval-like shape with flatenned top and bottom. This should be in the middle of both eyes beneath the antennas.

Step 7: Draw horizontal lines across the labrum for details.

Step 8: Now we draw the mouth of the bee for which we draw a triangle below the labrum and connect it on the sides of the head. Draw a small semi-circle at the bottom of the labrum and connect it with the bottom tip of the mouth.
How to Draw a Bee Face – Step-by-Step Tutorial