

Step 1: Draw a small, rounded head complete with a long, pointed beak and eye.

Step 2: Draw the wing, extending from the back of the bird's head.

Step 3: Now we will draw the underside of the body, using a long, wavy line.

Step 4: Add some feathery details to the wings.

Step 5: To finish the drawing, add two long legs to the bottom of the greenshank, complete with flat feet.
Interesting Facts about the Greenshank
Greenshanks are graceful wading birds with long, stout bills and greenish grey legs. Outside breeding season – the Greenshank is grey on its upper parts and white on the underbelly. Breeding season is from April to June – at which point the plumage changes to be darker, more spotty, and an extra white wedge is added to its tail. This wedge can be seen while the Greenshank is flying
Did you know?
- Greenshanks are the largest species of genus Tringa
- They forage all day
- Diet includes insects, larvae, mollusk, worms, and small fish
- Females lay four eggs
- Recorded to live up to fifteen years in the wild
Lesson Plan Idea – Before you actually show them a photo of the Greenshank, allow students to color their own photos of what they think it looks like. Reveal the full color photo. How do their interpretations compare to the real deal?
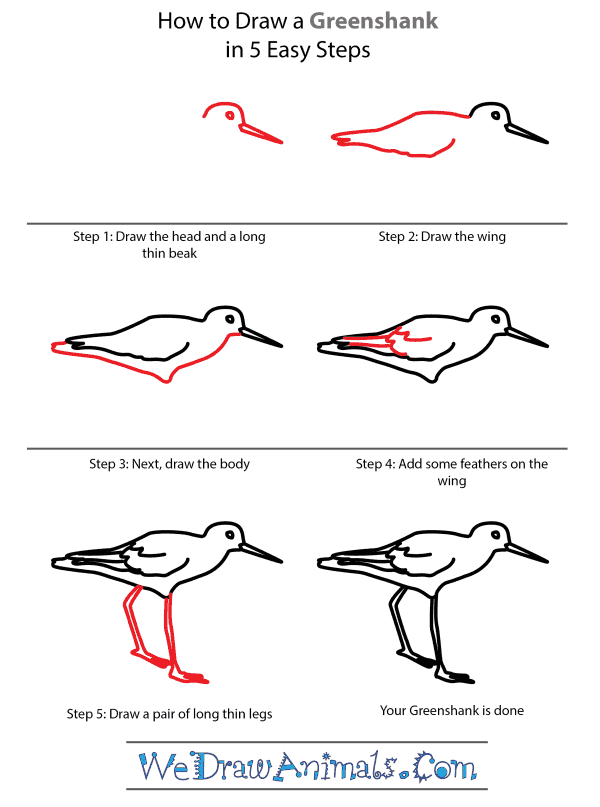
How to Draw a Greenshank – Step-by-Step Tutorial