
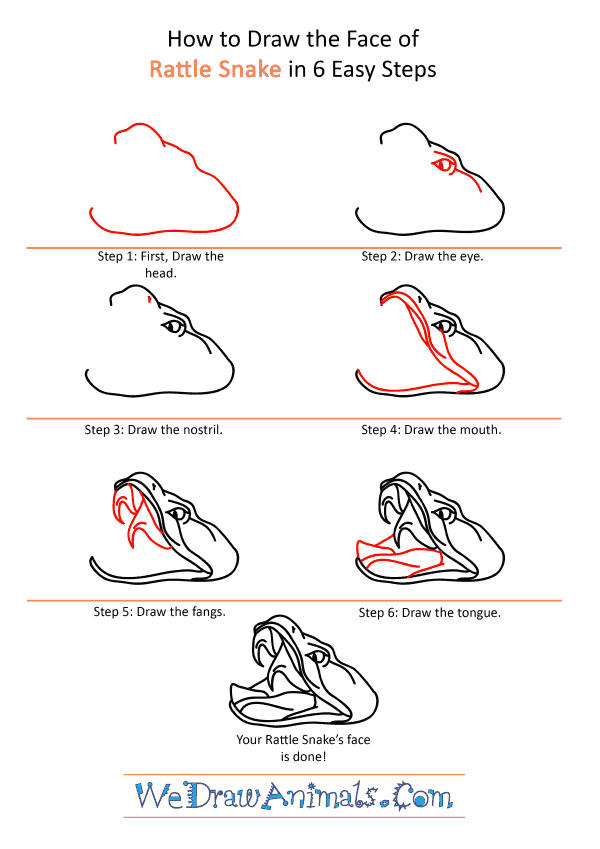
In this quick tutorial you'll learn how to draw a Rattlesnake Face in 6 easy steps - great for kids and novice artists.
The images above represent how your finished drawing is going to look and the steps involved.
Below are the individual steps - you can click on each one for a High Resolution printable PDF version.
At the bottom you can read some interesting facts about the Rattlesnake Face.
Make sure you also check out any of the hundreds of drawing tutorials grouped by category.
How to Draw a Rattlesnake Face - Step-by-Step Tutorial
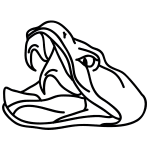

Step 1: The rattlesnake's head looks like the outline of a large shoe, seen from the side. Start by drawing this without the far back end.

Step 2: About mid way up the top of the head, place the eyes and two folds on either side of them.

Step 3: Further up the head, place a dot to make the nostril.

Step 4: Draw lines to create the mouth that give just enough room for the eye and nostril, but very little room on the lower jaw.

Step 5: Put in two fangs like inverted coat hooks at the top of the mouth, below the eye.

Step 6: Draw the tongue on the lower jaw so it looks like a potato chip.
How to Draw a Rattlesnake Face – Step-by-Step Tutorial