
In this quick tutorial you'll learn how to draw a Ringed Plover in 5 easy steps - great for kids and novice artists.
The images above represent how your finished drawing is going to look and the steps involved.
Below are the individual steps - you can click on each one for a High Resolution printable PDF version.
At the bottom you can read some interesting facts about the Ringed Plover.
Make sure you also check out any of the hundreds of drawing tutorials grouped by category.
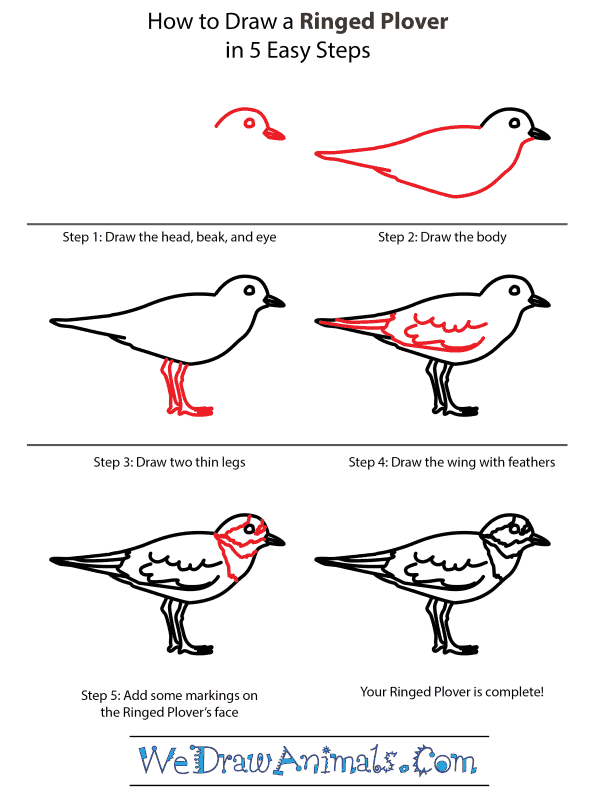
How to Draw a Ringed Plover - Step-by-Step Tutorial

Step 1: Begin with a rounded head, complete with tiny beak and one small eye.

Step 2: Draw the body, which consists of a curved belly and flat back that meet at the back to form a pointed-looking tail.

Step 3: Add two thin legs that slightly bend.

Step 4: Add the wings and feathers onto the body, trying to be as detailed as possible.

Step 5: Now all you have to do is add some unique markings to the bird's face, and you're finished.
Interesting Facts about the Ringed Plover
Ringed Plovers are resourceful creatures – in order to entice underground prey – Plovers stomp their feet on the ground to imitate rainfall. They travel in smaller flocks but larger gatherings of fifteen hundred Plovers is not that uncommon. It is territorial and will attack you if you try to disturb the clutch. A clutch of eggs can hold up to six.
Did you know?
- It is the most common wading bird in Europe
- They are bold black with white markings
- Young are patterned differently so as to avoid predators
- They have a unique way of foraging – stand, stare, run, attack, peck, repeat
- Habitat includes wetlands, rivers, sandbanks, and gravel pits
Lesson Plan Idea – Art Class – see if your children can come up with a way to imitate the rain. See who will come up with the best idea to get their prey out of hiding?Also – have a game where the children have to imitate the Plover foraging
How to Draw a Ringed Plover – Step-by-Step Tutorial