

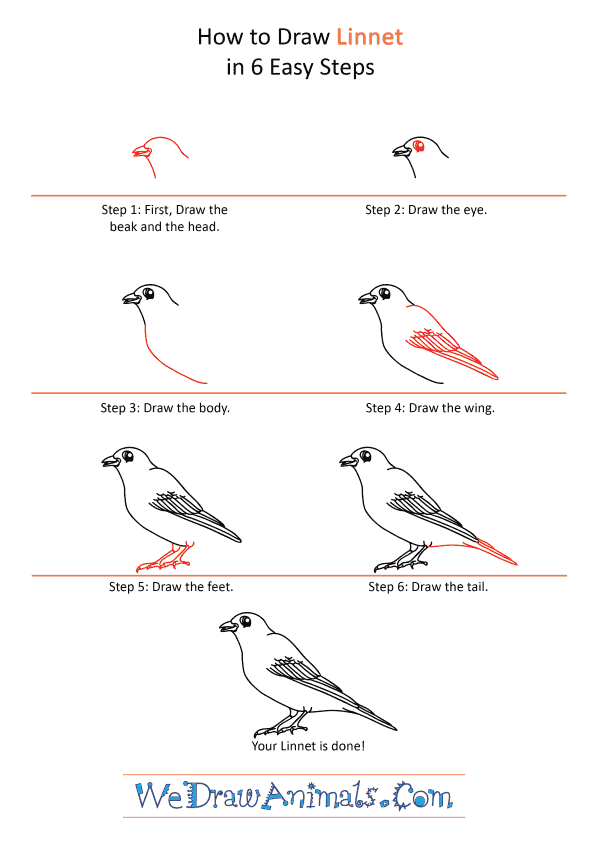
Step 1: Start by drawing the beak first by drawing a tiny triangle with a line in the middle. Draw a curved line above it and a curved diagonal line going downwards for the neck from below the beak.

Step 2: Draw a tiny circle behind the beak and shade it in for the eye.

Step 3: Draw a diagonal curved line below the the neck for the belly.

Step 4: Next we draw the wing by drawing a curved line from below the head and going down to form a diagonal cone at the end. Make horizontal curved lines on the wing and then draw long diagonal lines across the wing for feathers.

Step 5: Now we draw the feet by drawing two thin appendages below the belly with three pointy fingers. Draw pointed hook-like nails at the end of the claw.

Step 6: Draw a long line behind the wing for the tail and make it turn back from the edge to make a pointed tail. Connect the tail to the body by drawing a curved line from the belly to the tail.
How to Draw a Cartoon Linnet – Step-by-Step Tutorial