

Step 1: Start by drawing a small "C" for the head, complete with two small circles as eyes.

Step 2: Draw the neck extending from the lizard's head.

Step 3: On both sides, draw a tiny leg.

Step 4: Use two small, slightly curved lines to draw the body.

Step 5: Now add a longer set of legs to the back side of the lizard.

Step 6: Draw a long, simple tail to complete your illustration of the wall lizard.
Interesting Facts about the Wall Lizard
These Wall Lizards are sometimes mistaken for Viviparous Lizards – but the Wall Lizard has a slender body and a longer, pointed head. A green color is quite common in the males. Mating occurs in the spring. After six weeks the female will appear fat but you will not see actual eggs bumps. She will dig burrows in warm sand to bury her six eggs in. The young will start feeding within twenty-four hours of hatching.
Did you know?
- As their name states – their favorite habitat is a wall (or similar rock formation)
- It is a protected species in Europe
- Females can lay eggs up to three times per year
- Diet mainly consist of insects
- They prefer a warmer habitat of gravel or sand
Lesson Plan Idea – Research Wall Lizard hatchings. What is the perfect temperature to hatch the eggs? What does it take to get sand to this temperature?Alternate Idea – Have children color their own Wall Lizards, laminate them, and help the children create a sticky solution that helps them attach to the wall.
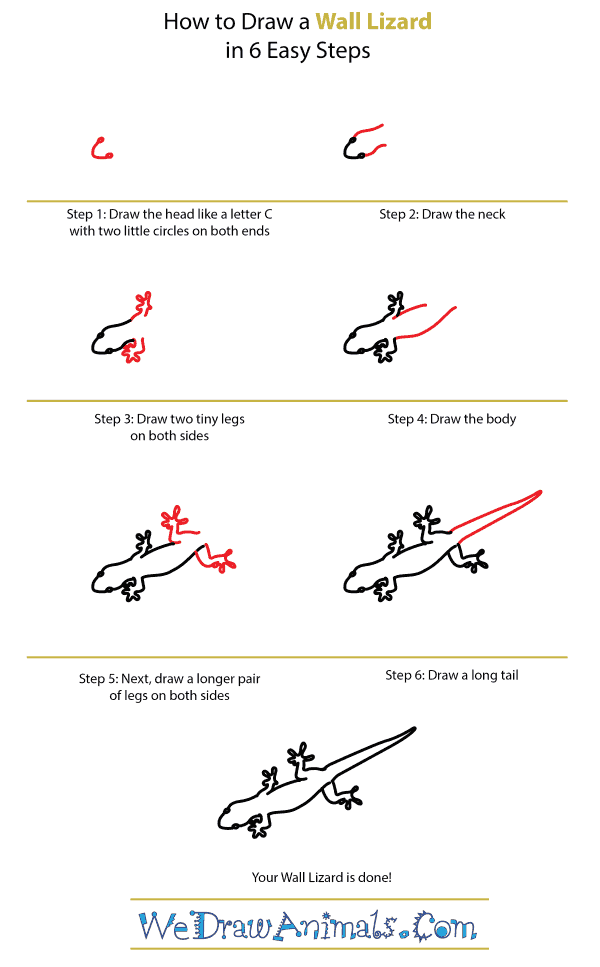
How to Draw a Wall Lizard – Step-by-Step Tutorial