
In this quick tutorial you'll learn how to draw Tigger From Winnie The Pooh in 8 easy steps - great for kids and novice artists.
The images above represent how your finished drawing is going to look and the steps involved.
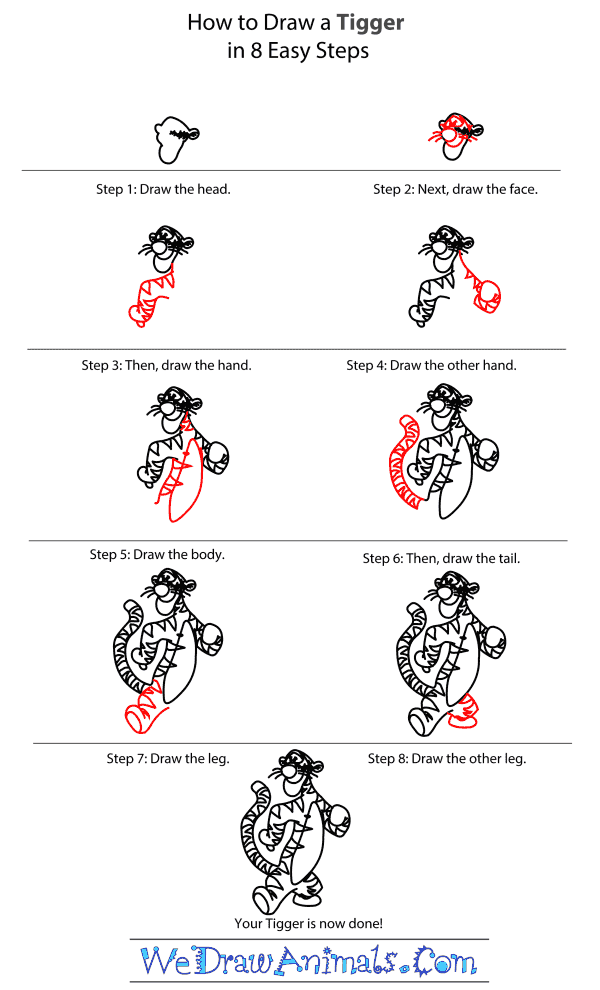
Below are the individual steps - you can click on each one for a High Resolution printable PDF version.
At the bottom you can read some interesting facts about the Tigger From Winnie The Pooh.
Make sure you also check out any of the hundreds of drawing tutorials grouped by category.
How to Draw Tigger From Winnie The Pooh - Step-by-Step Tutorial

Step 1:

Step 2:

Step 3:

Step 4:

Step 5:

Step 6:

Step 7:

Step 8:
Interesting Facts about TIGGER from Winnie the Pooh
Tigger is a member of the Disney casting group from the largest retail franchise in the world. The characters began being designed during 1923 in Los Angeles by Walt Disney, an American illustrator. They were featured in live-action film production, television, and theme parks. The sensation inspired an expansion of its existing operations and making an addition of theater, radio, music, publishing, and online media.
Did you know?
- This character was designed by A. A. Milne and used in books since 1928 that were adapted to film.
- His best friend is a blonde stuffed toy male bear named Winnie-the-Pooh.
- He is an orange bouncing tiger that is always happy, and his creation was inspired by one of the few plush toys owned by the author’s son Christopher Robin Milne.
- Other characters are Piglet, Rabbit, Owl, Kanga, Roo, and Eeyore.
- One of his better known roles is in the 2000 film The Tigger Movie. He has a cameo in some movies and television shows, and a stage performance.
The Disney company is well known for their products of its film studio. They own such television networks as ABC, A&E, ESPN, and Disney Channel. Other acquisitions involve merchandising, Dow Jones membership, and 14 theme parks around the world. The first creation within the business was Mickey Mouse, now the symbol of The Walt Disney Company.
How to Draw Tigger From Winnie The Pooh – Step-by-Step Tutorial