
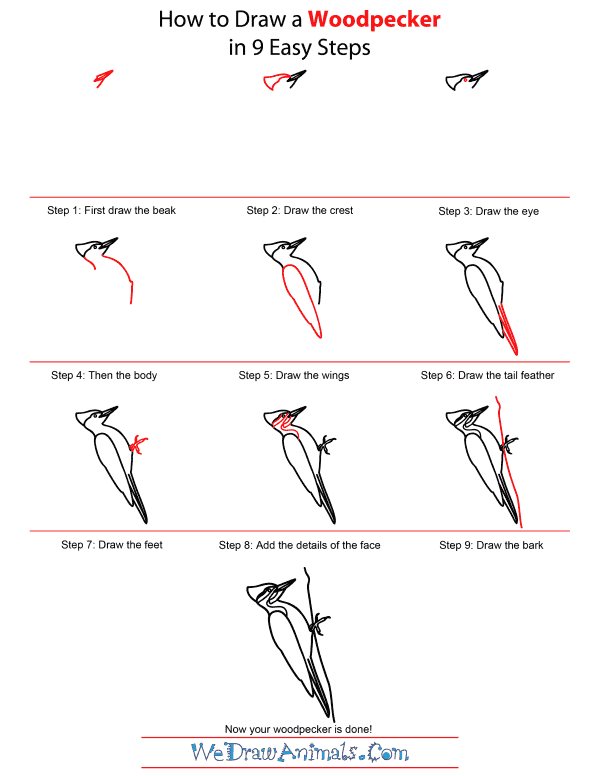
In this quick tutorial you'll learn how to draw a Woodpecker in 9 easy steps - great for kids and novice artists.
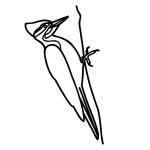
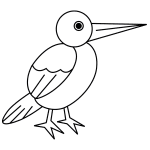
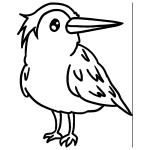
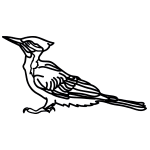
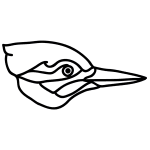
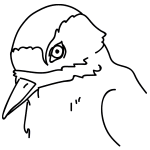
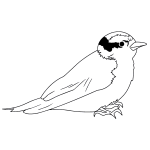
The images above represent how your finished drawing is going to look and the steps involved.
Below are the individual steps - you can click on each one for a High Resolution printable PDF version.
At the bottom you can read some interesting facts about the Woodpecker.
Make sure you also check out any of the hundreds of drawing tutorials grouped by category.
How to Draw a Woodpecker - Step-by-Step Tutorial


Step 1: A Woodpecker might look complicated, but it's easy if you take your time! Start by making a thin diamond for the beak, with a line in the middle. Add a small slanted line at the middle tip of the diamond to make the bird's chin.

Step 2: Now draw his head, with a slightly wavy line that starts from the top corner of the diamond, and then corners down into a curved line for the back of his head. Add a line with two small humps to connect the back of the head to the top corner of the beak and you're done with the head!

Step 3: Now add a small circle behind the beak for its eye. Did you know that woodpeckers don't just peck wood to find food, but also to talk to one another! Pecking is just another kind of twittering for a woodpecker!

Step 4: Let's start with the body. Put a small curvy line at the very back of the woodpecker, but leave space for the wings! Then put in a big curve for its belly, but add a small bump near the bottom for the Bird's legs.

Step 5: Now let's make a big oval with one flat end for the Woodpecker's wing. Try to add little bumps to make it look like the edges of a few big feathers.

Step 6: Now let's make some long tail feathers! Just draw some lines that curve up into thin shapes at the very bottom to fill all the empty space you've left.

Step 7: Remember that little bump we made earlier? Now let's draw the bird's foot. It's made of three claws, and looks a bit like a pitchfork! Make the end of the claws pointy too.

Step 8: The pattern on the bird's face looks complicated, but just take your time! Add a small line that stretches from beneath the eye to the back of his head, then a wavy line that starts below the beak and connects to the front of his wing. Add one more line just under that and you're set!

Step 9: Let's draw the bark, or even a branch that the bird is resting on. And there you have it, you've drawn a woodpecker!
Interesting Facts about Woodpeckers
Woodpeckers are birds that members of the Picadae family. They are known for pecking at trees with their long sharp beaks. They peck at tree trunks in order to find insects inside of them, and to build nests in the trees. There are about 180 species of woodpeckers.
Did You Know?
- Besides insects, woodpeckers also dine on fruit, nuts, and acorns.
- Woodpeckers can be found worldwide in wooded areas and forests, but they are endangered.
- On average, woodpeckers live for 4 to 11 years.
- One of the largest species of woodpecker is the ivory-billed woodpecker. It is almost two feet long and weighs between one and 1.25 pounds.
- The downy woodpecker is North America’s smallest species, and it is about six to seven inches long.
- Woodpeckers typically peck at tree trunks about 8,000 to 12,000 times a day.
- The length of a woodpecker’s tongue depends on the species, but it can be as long as four inches. At the tip of the tongue is a glue-like substance used for catching insects.
Possibly the most famous of all is Woody Woodpecker, who has been around since the 1940s. Woody is a funny animated character that was an acorn woodpecker featured on short films and his own TV show.
How To Draw A Woodpecker – Step-by-Step Tutorial