

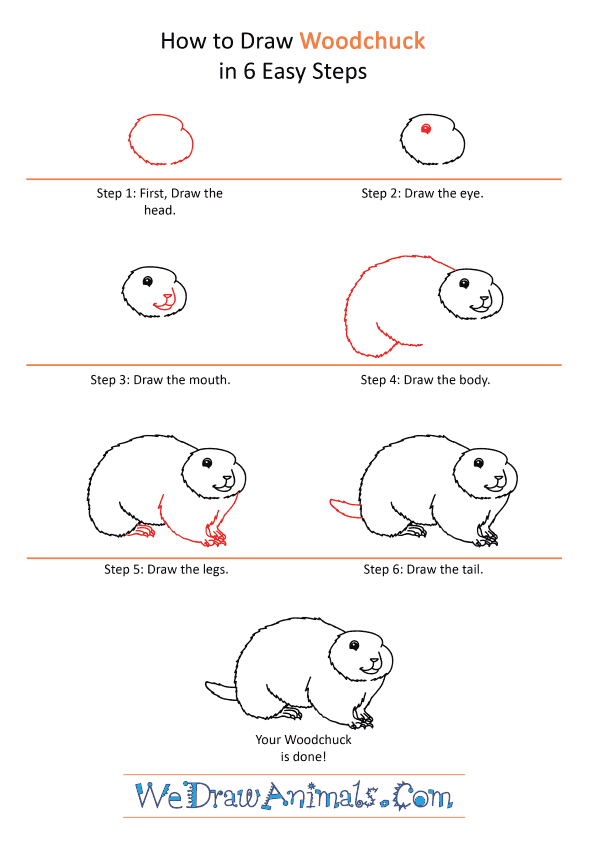
Step 1: Begin with the large circular head. Draw a fuzzy oval with a flattened “M” shape along the upper right side.

Step 2: Draw in the round eye, filling it in and adding a small curve at the bottom.

Step 3: Next, you'll draw in the nose and mouth. Draw a small triangle for the nose a short distance below and to the left of the “M” shape in the head and add a “W” shape below it, extending the middle part up to the bottom of the nose. Draw in a curve from the left side of the mouth to just above and to the right of the nose.

Step 4: Draw the back and belly parts of the body now. Draw in a long, fuzzy curve extending from the top of the left side of the head down and around to a hook for the back leg opposite the head. Draw a short diagonal fuzzy curve intersecting the hook where it ends.

Step 5: Next, draw in the front legs and feet. Draw a fuzzy curve from above the curve for the belly out diagonally under the head. Draw in a diagonal line with slight curve from the cheek on the right side, giving it a sharp curve to the right near the end and add in another furry diagonal curve a little ways under the head with a sharp curve to the right in it for the foot. Then add several thin loops for the toes at the bottom of the legs as well as some small curves for the claws on the toes.

Step 6: Finally, add in a pointed loop for the tail on the lower left side.
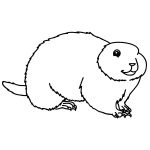
How to Draw a Cartoon Woodchuck – Step-by-Step Tutorial